Welcome to our comprehensive guide on how to stain a deck in New Zealand, where we’ll walk you through everything you need to know to keep your deck looking beautiful and protected against the elements. Staining your deck is a crucial part of maintenance, enhancing its natural beauty while shielding it from the harsh New Zealand weather. In this guide, you’ll discover the benefits of staining, the best types of stains for our unique climate, and a step-by-step process to achieve professional results. Whether you’re a DIY enthusiast or a first-time deck owner, this guide is designed to make the process straightforward and rewarding. Let’s dive into the details and ensure your deck remains a stunning feature of your home for years to come.
To stain a deck in New Zealand, start by cleaning and repairing the surface to ensure it is free of dirt and damage. Choose an appropriate day with favorable weather conditions, and select a high-quality oil-based or water-based stain suited for NZ’s climate. Apply the stain evenly using a brush or roller, beginning with a test patch. Allow the first coat to dry thoroughly before applying a second coat for a uniform finish. Regular maintenance, including periodic cleaning and touch-ups, will keep your deck looking great and well-protected.
- Understanding Deck Staining
- Preparation Before Staining
- The Staining Process
- Aftercare And Maintenance
- Troubleshooting Common Issues
- Expert Tips And Recommendations
- FAQs: About How To Stain A Deck NZ
- How long does it take to stain a deck?
- Can I stain a wet deck?
- What’s the best stain for NZ’s climate?
- How often should I re-stain my deck?
- Can I apply a new stain over an old one?
- What should I do if my stain turns out blotchy?
- Is it necessary to sand my deck before staining?
- Can I use a sprayer to apply deck stain?
- What’s the ideal weather for staining a deck?
- How do I maintain my stained deck?
- Conclusion
Understanding Deck Staining
What is Deck Staining
Deck staining is a crucial maintenance practice for preserving the beauty and integrity of your outdoor deck. Unlike painting, which adds a layer of color on the surface, staining penetrates the wood, providing a rich, natural look while offering protection. Sealing, on the other hand, primarily focuses on protecting the wood from moisture without necessarily enhancing its appearance. Staining strikes a balance between these two, enhancing the deck’s natural beauty while providing a shield against the elements.
Deck staining involves applying a specially formulated solution that soaks into the wood. This process highlights the natural grain and texture of the wood, giving your deck a warm and inviting appearance. The pigments in the stain can either maintain the wood’s natural color or change it to a desired shade, allowing homeowners to customize the look of their deck.
Benefits of Staining Your Deck
Staining your deck offers numerous benefits, making it a preferred choice for many homeowners. Here are some key advantages.
1. Protection Against Elements
Staining provides a protective barrier against the harsh elements. It helps to shield the wood from UV rays, which can cause fading and warping over time. Additionally, it repels water, preventing moisture from seeping into the wood and causing rot or mold growth. This protection is essential, especially in New Zealand’s diverse climate, where decks are exposed to varying weather conditions.
2. Enhancing Natural Wood Beauty
One of the most appealing aspects of staining is its ability to enhance the natural beauty of the wood. Unlike paint, which can cover the wood’s grain and texture, stain allows these characteristics to shine through. This results in a more natural, rustic appearance that many homeowners find attractive. The variety of stain colors available means you can choose a shade that complements your home’s exterior and personal style.
3. Prolonging the Deck’s Lifespan
Regular staining not only keeps your deck looking good but also extends its lifespan. By protecting the wood from damage caused by moisture, UV rays, and mildew, staining helps to maintain the structural integrity of your deck. This means fewer repairs and replacements over time, saving you money in the long run.
Types of Stains
Choosing the right type of stain is critical for achieving the best results. There are two main types of deck stains: oil-based and water-based, each with its own set of advantages.
1. Oil-Based Stains
Oil-based stains penetrate deeply into the wood, providing long-lasting protection and a rich finish. They are excellent at repelling water and are more resistant to wear and tear. However, they can take longer to dry and may require more effort to apply and clean up.
2. Water-Based Stains
Water-based stains are easier to apply and clean up, as they are less messy and dry faster than oil-based stains. They are also more environmentally friendly and have lower levels of volatile organic compounds (VOCs). However, they may not penetrate as deeply as oil-based stains, which can result in a shorter lifespan.
When choosing a stain for your deck, consider the specific conditions in New Zealand. The climate can be quite varied, so it’s essential to select a stain that can withstand the local weather. Oil-based stains may offer more durability in areas with high humidity or heavy rainfall, while water-based stains might be preferable in regions with less severe weather conditions. Consulting with a local expert can help you make the best choice for your deck.
Understanding deck staining and its benefits can significantly impact the longevity and appearance of your outdoor space. By choosing the right stain and applying it regularly, you can protect your deck from the elements, enhance its natural beauty, and extend its lifespan, ensuring that your outdoor area remains a welcoming retreat for years to come.

Preparation Before Staining
Proper preparation is essential to achieve a professional-looking finish when staining your deck. This section will guide you through the necessary steps to ensure your deck is ready for staining. Following these steps carefully will help you achieve the best results.
1. Safety Precautions
Before you begin, it’s crucial to prioritize safety. Staining products and cleaning agents can be hazardous if not handled properly. Here are some key safety precautions.
- Protective Gear: Always wear protective gloves to prevent skin contact with chemicals. Use a mask to avoid inhaling fumes and dust, and wear safety goggles to protect your eyes from splashes and dust particles.
- Safe Handling of Stains and Cleaning Products: Read the manufacturer’s instructions on the stains and cleaning products. Ensure you work in a well-ventilated area to avoid inhaling harmful fumes. Store all chemicals out of reach of children and pets.
2. Materials and Tools Needed
Gather all necessary materials and tools before starting the project. This ensures a smooth workflow without interruptions. Here’s a comprehensive list of what you’ll need.
- Stain: Choose a high-quality stain suitable for your deck’s material.
- Brushes and Rollers: Use high-quality brushes and rollers designed for stain application.
- Drop Cloths: Protect surrounding areas from stains and splatters.
- Cleaning Products: Deck cleaner or mild detergent for washing the deck.
- Sanding Tools: Sandpaper or an electric sander for smoothing the deck surface.
You can find these materials at hardware stores like Mitre 10, Bunnings Warehouse, or online retailers in New Zealand.
3. Cleaning the Deck
A clean deck is essential for the stain to adhere properly and achieve a uniform finish. Follow these steps for effective cleaning.
- Sweeping: Start by sweeping the deck thoroughly to remove loose dirt, leaves, and debris.
- Washing: Use a garden hose or pressure washer to rinse the deck. For a deeper clean, apply a deck cleaner according to the manufacturer’s instructions.
- Using a Deck Cleaner: Mix the deck cleaner with water as directed and apply it to the deck using a brush or sprayer. Scrub the deck with a stiff-bristle brush to remove any remaining dirt, mold, or mildew. Rinse the deck thoroughly with clean water and allow it to dry completely before proceeding.
4. Repairing the Deck
Inspect your deck for any damage and make necessary repairs to ensure a smooth and safe surface for staining.
- Inspecting for Damage: Check for loose boards, protruding nails, or any signs of rot. Pay special attention to areas that are frequently exposed to moisture.
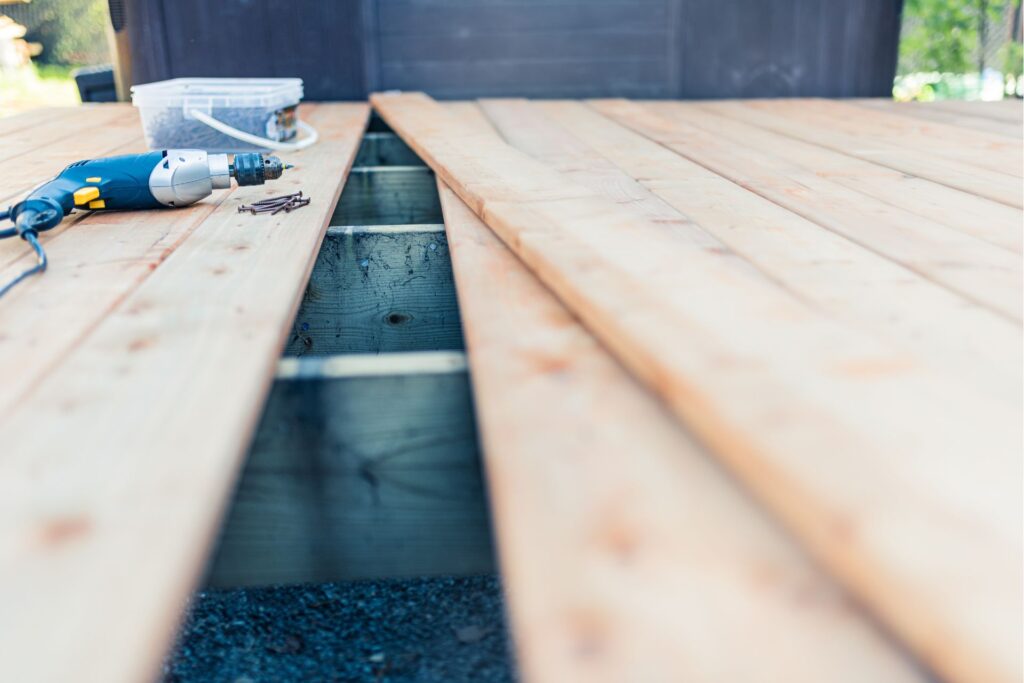
- Making Necessary Repairs: Secure loose boards with screws or nails. Replace any damaged or rotten wood. If you encounter protruding nails, hammer them back into place or replace them with deck screws for better hold.
5. Sanding the Deck
Sanding the deck is a crucial step to ensure the stain adheres properly and provides a smooth finish.
- Why Sanding is Crucial: Sanding removes old stain residues, splinters, and rough spots, providing a smooth surface for the new stain to adhere to.
- Tips for Effective Sanding: Use medium-grit sandpaper (60-80 grit) for initial sanding, followed by fine-grit sandpaper (120-150 grit) for a smooth finish. Always sand in the direction of the wood grain to avoid scratches. If using an electric sander, ensure even pressure to prevent gouging the wood.
By carefully following these preparation steps, you’ll set a strong foundation for a successful deck staining project, ensuring a beautiful, long-lasting finish.

The Staining Process
Staining wood can transform its appearance, enhancing its natural beauty while providing protection. This section will guide you through the staining process, ensuring you achieve the best results for your project in New Zealand.
1. Choosing the Right Day
Ideal Weather Conditions for Staining in NZ
Choosing the right day for staining is crucial. In New Zealand, the weather can be quite variable, so it’s essential to pick a day with mild temperatures and low humidity. Ideally, the temperature should be between 10-30°C. Avoid staining on extremely hot days or when rain is expected, as this can affect the stain’s drying process and overall finish.
2. Testing the Stain
Importance of Testing on a Small Area
Before committing to staining the entire surface, it’s vital to test the stain on a small, inconspicuous area. This allows you to see how the stain reacts with the wood and ensures that you are happy with the color.
Adjusting Based on Wood Type and Desired Color
Different types of wood absorb stain differently. Softwoods like pine will absorb more stain and appear darker, while hardwoods like oak may require multiple coats to achieve the desired depth of color. Adjust the stain’s concentration or application technique based on your observations from the test patch.
3. Applying the Stain
Step-by-Step Application Process
Start by preparing the wood surface, ensuring it is clean, dry, and sanded smooth. Use a tack cloth to remove any dust.
Techniques for Even Application (Brushing vs. Rolling)
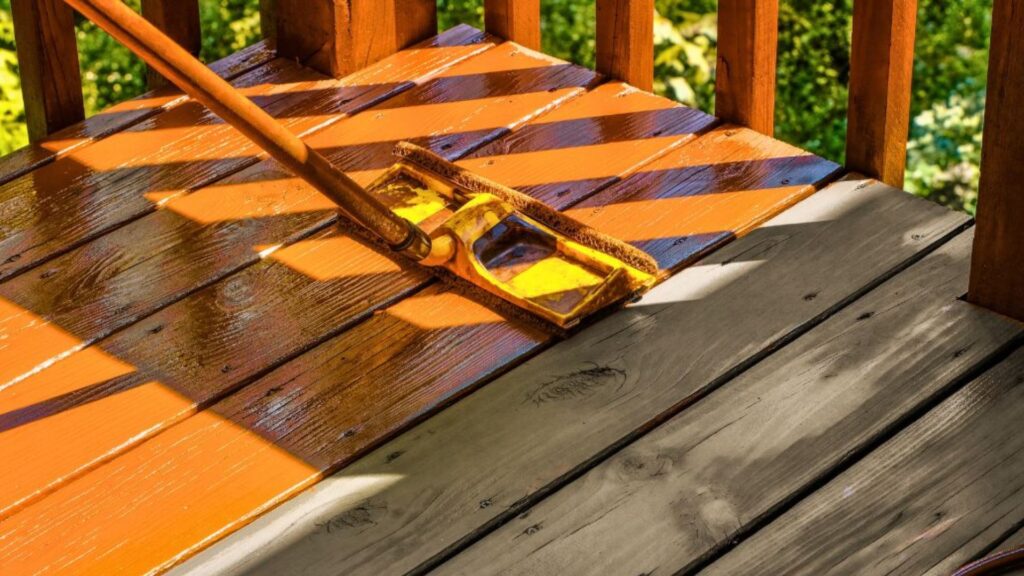
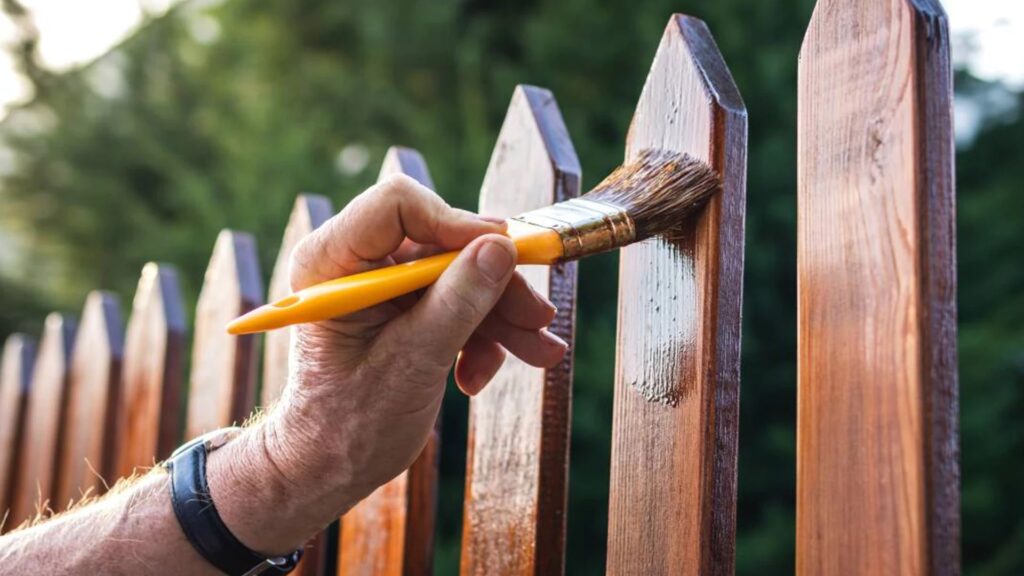
When applying the stain, you can use a brush or a roller. Brushing is ideal for detailed work and smaller areas, while rolling can be more efficient for larger surfaces. Whichever method you choose, apply the stain in the direction of the wood grain for an even finish. Work in manageable sections to prevent the stain from drying unevenly.
4. First Coat
How to Apply the First Coat
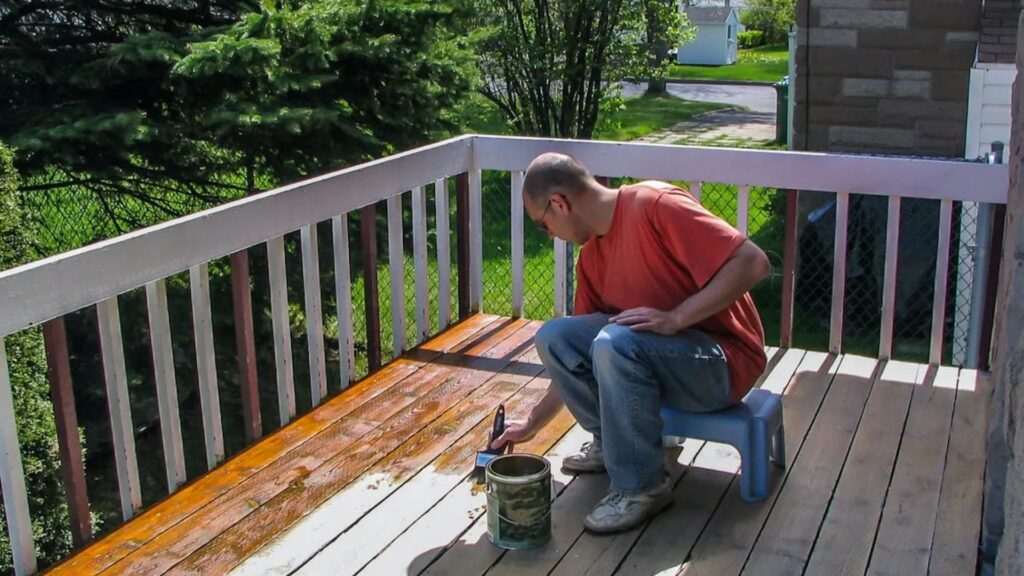
Apply the first coat of stain evenly across the surface. Ensure you do not leave any excess stain on the wood as it can lead to blotchy spots.
Drying Time and What to Watch For
Allow the first coat to dry completely, which typically takes about 24 hours, depending on the weather conditions. During this time, avoid touching the surface to prevent any imperfections. Look for any areas that may need additional sanding or touch-up before applying the next coat.
5. Second Coat
Necessity and Application of a Second Coat
A second coat is often necessary to achieve a richer and more uniform color. Apply the second coat in the same manner as the first, ensuring even coverage.
Ensuring a Uniform Finish
After the second coat, allow it to dry thoroughly. If desired, you can lightly sand the surface with fine-grit sandpaper between coats to achieve an ultra-smooth finish. Ensure all sanding dust is removed before applying any additional coats.
By following these steps, you’ll be able to stain your wood surfaces effectively, enhancing their appearance and ensuring long-lasting protection. Remember, patience and attention to detail are key to achieving a professional-looking finish.
Aftercare And Maintenance
Immediate Aftercare
Once your deck is installed, immediate aftercare is crucial to ensure its longevity and pristine appearance. The first step is to allow the deck to dry completely. Depending on the weather conditions, this might take a few days to a week. It’s important to keep the deck free from foot traffic and any debris during this drying period. This prevents any potential damage or staining from dirt and other materials that might settle on the surface. By giving your deck ample time to dry and settle, you’re setting a solid foundation for its future maintenance.
Regular Maintenance Tips
Regular maintenance is the key to preserving the beauty and durability of your deck. Periodic cleaning is essential to remove dirt, mildew, and any other buildup that can occur over time. A simple mixture of water and mild soap can do wonders for keeping your deck looking fresh. Make it a habit to inspect your deck regularly, checking for any signs of wear and tear such as loose boards or nails, and addressing them promptly.
In addition to cleaning, touch-up staining may be necessary to maintain the deck’s appearance. Over time, exposure to the elements can cause the stain to fade or wear off in certain areas. Touching up these spots helps to protect the wood and keep your deck looking uniform and attractive. Remember, the better you care for your deck, the longer it will last, providing you with a beautiful outdoor space for years to come.
When to Re-Stain
Knowing when to re-stain your deck is essential for its upkeep. There are several signs that indicate it’s time for a new coat of stain. If you notice that water no longer beads up on the surface but instead soaks into the wood, it’s a clear sign that the protective stain has worn off. Additionally, if the wood appears faded, discolored, or you see any visible cracks, it’s time to re-stain.
The frequency of re-staining depends largely on the specific conditions in New Zealand. The harsh UV rays and varying weather conditions can take a toll on outdoor wood surfaces. Generally, it’s recommended to re-stain your deck every one to two years to ensure it remains protected and looks its best. However, if your deck is in a shaded area or has some protection from the elements, you might be able to extend this period slightly.
By following these aftercare and maintenance tips, you’ll ensure that your deck remains a beautiful and functional part of your outdoor space. Regular attention to cleaning, inspections, and timely re-staining will not only enhance the appearance of your deck but also prolong its lifespan, allowing you to enjoy it for many years to come.

Troubleshooting Common Issues
1. Blotchy Stain
Causes and Solutions
Blotchy stains can be a real headache, especially when you’ve put in a lot of effort to achieve a uniform look. The main culprits behind blotchy staining are often related to the preparation and application process. For instance, inconsistent application, uneven absorption due to surface conditions, or inadequate preparation can all lead to blotchy results.
Causes
- Surface Preparation: If the surface isn’t cleaned thoroughly, dirt, oil, and old coatings can interfere with the stain’s ability to penetrate evenly.
- Application Techniques: Using the wrong tools or applying the stain unevenly can result in blotchy patches. For example, using a brush instead of a sprayer or roller can sometimes lead to uneven coverage.
- Moisture Content: High moisture content in the material can prevent the stain from soaking in properly, leading to uneven coloring.
Solutions
- Proper Cleaning: Ensure the surface is thoroughly cleaned and free from contaminants. Use appropriate cleaners and degreasers to prepare the surface.
- Consistent Application: Use high-quality tools such as sprayers or rollers for even application. Practice consistent strokes and overlap slightly to ensure uniform coverage.
- Moisture Control: Test the moisture level of the material before staining. It should be within the recommended range for your specific stain product. If needed, allow the material to dry out to the appropriate moisture level before applying the stain.
2. Peeling or Flaking
How to Address and Prevent It
Peeling or flaking stains are often a sign that the stain hasn’t adhered properly to the surface. This can be due to several factors, including improper surface preparation, using the wrong type of stain, or environmental conditions during application.
Causes
- Inadequate Surface Preparation: If the surface is not properly sanded or cleaned, the stain can fail to bond with the material.
- Incorrect Stain Type: Using a stain that is not suitable for the material or environmental conditions can lead to peeling. For example, exterior stains might not perform well indoors and vice versa.
- Application Conditions: Applying stain in extreme temperatures or high humidity can affect the curing process, leading to poor adhesion.
Solutions
- Thorough Preparation: Sand the surface to create a smooth, clean base for the stain. Ensure all dust and debris are removed.
- Correct Product Choice: Select a stain that is appropriate for your specific project and environmental conditions. Consult with a professional if you’re unsure.
- Optimal Conditions: Apply the stain in recommended temperature and humidity ranges. Avoid application during extreme weather conditions.
3. Color Issues
Dealing with Uneven or Unexpected Colors
Achieving the desired color with a stain can sometimes be challenging. Uneven or unexpected colors often arise due to inconsistencies in the material, improper mixing of the stain, or varying absorption rates.
Causes
- Material Variability: Different sections of the same material can absorb stain differently, leading to color variations.
- Improper Mixing: Not mixing the stain thoroughly can result in inconsistent color application.
- Absorption Rates: Variations in the material’s density and porosity can cause uneven color uptake.
Solutions
- Test Samples: Always test the stain on a small, inconspicuous area or a sample piece of the same material. This helps you understand how the stain will look and adjust if necessary.
- Consistent Mixing: Stir the stain thoroughly before and during application to ensure a uniform color.
- Pre-treatment: Consider using a pre-stain conditioner to help even out absorption rates, especially on softwoods or porous materials. This can help achieve a more uniform color.
By understanding and addressing these common staining issues, you can achieve a professional and lasting finish on your projects. Whether it’s dealing with blotchy stains, peeling, or color inconsistencies, proper preparation, and application techniques are key to success.

Expert Tips And Recommendations
Professional Insights
When it comes to decking, listening to the experts can make a world of difference. We reached out to several experienced decking professionals in New Zealand to gather their top tips. John Smith from Deck Masters advises, “Always start with a solid plan. Know the climate challenges in your area and choose materials accordingly.” Another seasoned expert, Jane Doe from Kiwi Decking Solutions, adds, “Regular maintenance is key. An annual check-up can prevent minor issues from becoming major problems.” These insights highlight the importance of careful planning and consistent upkeep, ensuring your deck remains in top shape for years to come.
Product Recommendations
Choosing the right products can significantly extend the life of your deck. For those looking to stain their decks, NZ professionals often recommend brands like Resene and Cabot’s. Resene Decking Stain is praised for its durability and UV protection, making it ideal for the harsh New Zealand sun. Cabot’s Aquadeck is another favorite, known for its ease of application and water resistance. Both products come in a variety of colors, allowing you to customize the look of your deck while ensuring it stays protected against the elements.
Additional Resources
To help you further, we’ve compiled a list of additional resources that can guide you through your decking projects. Check out this (https://example.com/deck-maintenance-video), which provides step-by-step instructions on keeping your deck in pristine condition. If you prefer hands-on learning, consider attending local workshops or classes. Many community centers and DIY stores across New Zealand offer sessions on deck building and maintenance, providing valuable knowledge and practical skills.
These expert tips and recommendations can help you make informed decisions, ensuring your deck not only looks great but also stands the test of time.

FAQs: About How To Stain A Deck NZ
How long does it take to stain a deck?
The time it takes to stain a deck can vary based on the size of the deck and the drying conditions. Typically, it takes one to two days to clean, prep, and apply the stain, with additional drying time needed between coats and before use.
Can I stain a wet deck?
No, staining a wet deck is not recommended. The deck should be completely dry to ensure proper absorption of the stain. Wet or damp wood can prevent the stain from penetrating and adhering properly, leading to an uneven finish.
What’s the best stain for NZ’s climate?
Both oil-based and water-based stains can be suitable for NZ’s climate. However, oil-based stains generally offer better protection against moisture and UV damage, making them a popular choice for outdoor decks in New Zealand.
How often should I re-stain my deck?
Re-staining frequency depends on factors like climate, deck usage, and the type of stain used. Generally, it’s recommended to re-stain your deck every 2-3 years to maintain its appearance and protective qualities.
Can I apply a new stain over an old one?
It’s best to remove the old stain before applying a new one. This ensures better adhesion and a more uniform finish. Use a deck cleaner or stripper to remove old stain and then sand the deck before applying the new stain.
What should I do if my stain turns out blotchy?
Blotchy stain can result from uneven application or improper surface preparation. To fix it, you may need to sand the affected areas and reapply the stain, ensuring a more even coat. Always test the stain on a small area first.
Is it necessary to sand my deck before staining?
Yes, sanding the deck before staining is recommended. Sanding smoothens the wood surface, removes any remaining old stain, and opens up the wood pores to better absorb the new stain, resulting in a more even and lasting finish.
Can I use a sprayer to apply deck stain?
Yes, you can use a sprayer to apply deck stain. However, make sure to back-brush or back-roll after spraying to ensure even coverage and penetration of the stain into the wood.
What’s the ideal weather for staining a deck?
The ideal weather for staining a deck is a day with mild temperatures (between 10°C and 25°C), low humidity, and no rain forecast for at least 24-48 hours. Avoid staining in direct sunlight or windy conditions.
How do I maintain my stained deck?
To maintain your stained deck, clean it regularly to remove dirt and debris, inspect it for damage, and reapply stain or touch up areas as needed. Regular maintenance helps prolong the life of the stain and keeps your deck looking its best.
Conclusion
To wrap up, we’ve delved into the detailed process of staining your deck, highlighting its crucial role in preserving and enhancing the beauty of your outdoor space. By now, you should have a solid grasp of why staining is not just a cosmetic choice but a vital maintenance task. We encourage you to take this step and see the transformative impact it can have on your deck. Don’t just take our word for it – give it a try and witness the difference firsthand. We’d love to hear about your experiences or any questions you might have. Feel free to share them with us. Additionally, don’t forget to subscribe to our newsletter for more practical home maintenance tips that will keep your living space in top shape.
About the Author:
Mike Veail is a recognized digital marketing expert with over 6 years of experience in helping tradespeople and small businesses thrive online. A former quantity surveyor, Mike combines deep industry knowledge with hands-on expertise in SEO and Google Ads. His marketing strategies are tailored to the specific needs of the trades sector, helping businesses increase visibility and generate more leads through proven, ethical methods.
Mike has successfully partnered with numerous companies, establishing a track record of delivering measurable results. His work has been featured across various platforms that showcase his expertise in lead generation and online marketing for the trades sector.
Learn more about Mike's experience and services at https://theleadguy.online or follow him on social media:

